


580w Milano Mirrored Infrared Heating Panel
Original price was: £293.54.£95.99Current price is: £95.99.
- Online assistance, always just a message away.
- Enjoy top quality items for less
- Buy quality, buy with us.
- Shop with confidence, enjoy free returns.

- Length59.5 cm
- MaterialGlass
- ShapeRight
- Heating elementGlass
- Power580.0 W
- ManoMano ReferenceME70724601
- Product codeMIR-580W
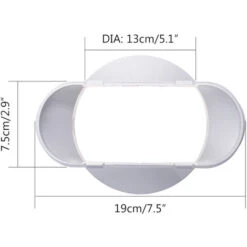
Go for a massive improvement on your current heating techniques with a glamorous infrared panel heater from Mirrorstone. If you wish to make your heating more attractive, more efficient, and more eco-friendly, then you’ve come to the right place. Measuring approximately 995mm in length x 595mm in width, this 580w heater can heat an area that’s around 9-10m2. At just 22mm in depth, this looks stunning when mounted on either a wall or a ceiling, barely sticking out at all.
The surface is made from a mirrored glass, which looks simply superb. Whilst it can reach temperatures of 115˚C, this shouldn’t be a problem because they fit closer to the wall, and can also be installed further out of reach than a radiator. With an IP54 rating, you don’t need to worry about any accidental splashes of water.
What’s Infrared Heating All About?
Infrared heating is very efficient when compared to conventional radiators, as it provides its heat in a different way. Infrared heating can actually save you up to 60% on your heating bills!
By heating the objects in the room, rather than just the air around the room, an infrared heater can save energy. The infrared beams that it emits bounce off the objects, leaving them warmed. This is more efficient than a conventional radiator, as they just warm the air around the heater. As the surface area of the objects in the room is a lot less than the volume of air in the room, it requires less energy.
Sleek Appearance

Slender Design

Easy Installation

These panels are extremely easy to install – you won’t need any additional help at all.
That means no carpenters, no plumbers, and no electricians – there simply isn’t the requirement for any complicated work. The panels are fully plug-and-play compatible, so the only work you have to do is to get it on the wall.
Using the included stencil, just draw through the holes onto the wall so you know where to drill the holes.
Once the holes are there, you just put some screws in the wall, and hang the panel from the two brackets on the rear side. Once it’s up, just simply plug the panel in. It just takes a few minutes from start to finish.
Be the first to review “580w Milano Mirrored Infrared Heating Panel”
Related products
Electric heaters and radiators


Electric heaters and radiators
Electric heaters and radiators
Electric heaters and radiators

Air to air heat pump installation

Electric heaters and radiators
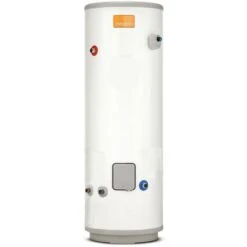
Heatrae Sadia Megaflo Eco Plus 500 Litre Indirect Unvented Cylinder 95050713
Electric heaters and radiators
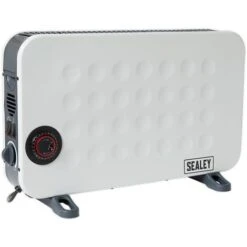
Sealey CD2013TT Convector Heater 2000W/230V With Turbo & Timer
Electric heaters and radiators
Reviews
There are no reviews yet.